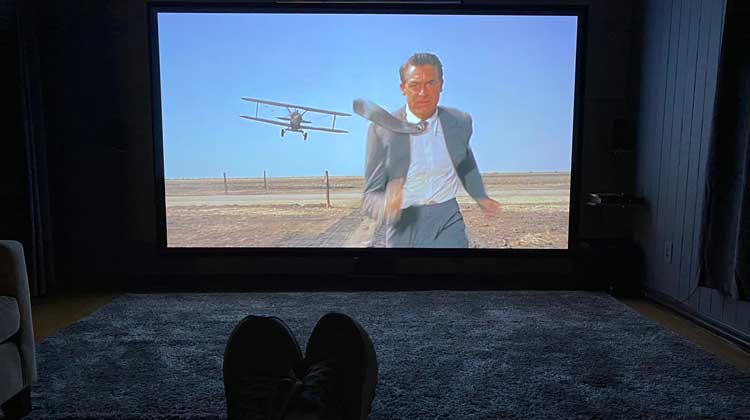
 Did the shutdown leave you hankering for a trip to the movies? You remember, that bygone era where you could see each other’s entire face, grab some popcorn, and get lost in an adventure, drama, or comedy for a short period of time.
Well, my wife and I sure wanted that kind of freedom. So, while swimming in the uncertainty of the shutdown, I decided to do something about it and created a home movie theater. It turned out better than I could ever have imagined.
The result is (as we’ve already realized) countless hours of entertainment in what truly feels like a bona fide movie theater—and it’s just a few steps away in the basement.
The point I’d like to get across to you is that if I can do it, you probably can too. So what follows is a somewhat chronological description of how I converted part of our basement into a movie room and an idea about costs involved. This definitely isn’t the only way to create a movie theater, but I wanted to tell you what I did to make it work.
For starters, anyone can build a move room. It’s really just a room in which you can watch movies. For me, I didn’t necessarily have delusions of grandeur, but I wanted to make something kind of cool—a place for family and friends to watch epic productions and, at least, have the feel of a real movie theater.
I perused various YouTube channels for suggestions, but then I just kind of jumped into it. The process was one of checking and adjusting plans throughout the process—from screen size to projector type and sound system and a bunch of other aspects I discovered. So, despite my sometimes-disjointed approach to this, here’s my step-by-step description of how I built our movie oasis.
Please note: My goal was to do this without going behind walls for wiring or doing any construction build outs—basically a “plug and play” approach as nice as I could make it. I am not a professional contractor, and cannot advise you about local building codes, so always make sure you do your homework and are in compliance with local codes where required.
The Space
First, I needed a room. This was easy. One side of our basement had limited light pollution and stored a bunch of junk (and also served as sort of a music room for my drums). The room is 23 feet long and about 11 feet wide. I had pictured my drums in the back of the room looking toward the wall at the front where the screen would go. Seating would go right in front of the drums, and then there would be about 15 feet or so to the screen. The first step in this space was to clean out as much as I could so I could get to work.
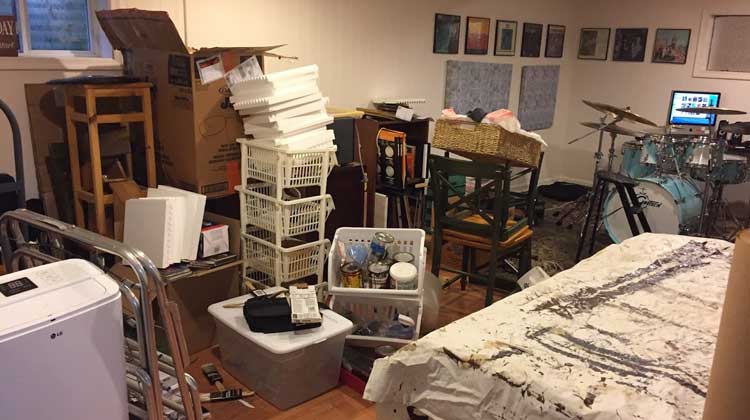
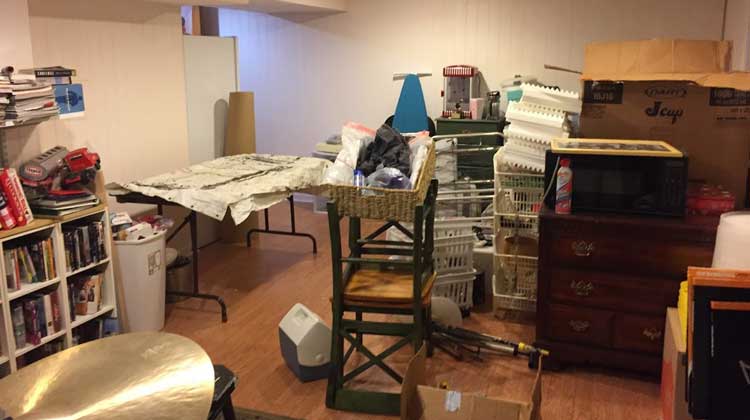
Darkness Rules
The floor was a medium color laminate, and the walls and ceiling were wood paneled and painted white. Once it was as clean as I could get it, the next step was to darken the room. The walls needed swallow light and not reflect it, so a dark, flat Behr Premium Plus paint was the order of the day. I chose the color Mission Control ($75 for three gallons). The trim and baseboards would be even darker with a semi-gloss (easier to clean) Behr Premium Plus color Digital ($30 for two quarts). For the floor I purchased very large gray area rug that I got at Wayfair.com for about $250.
Thinking about Equipment
With the room and trim painted, it was time to think about the actual equipment that would make the movie room a movie room. In this section, I’m talking about the main components. In the “Putting it all Together” section below, there are some other necessary items to get everything together and working, but these are the basic necessary components: a projector, a sound system, and a screen. I would suggest making a budget for yourself as you plan, but I was kind of winging it—basically balancing what I could afford with how badly I wanted it.
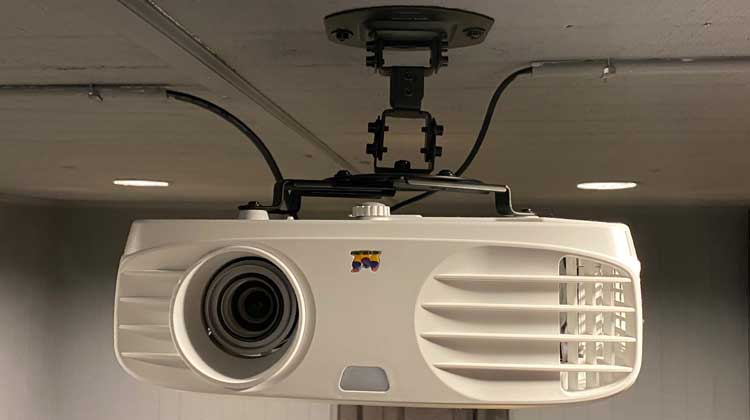 For the projector, I looked high and low online for information. There was a small debate in my mind between going with a 4K projector or just one that was high definition (HD). I chose the less-expensive HD just because I knew I’d still be very happy with it. Looking at several brands I first settled on one that came in around $900. But when I went to check out, the wait for it was going to be something like three months. (I noticed that a lot of projectors had long waits, so I assumed a lot of people were doing the same thing during the lockdown.) I cancelled that purchase and looked some more. After reviewing other models, I settled on a ViewSonic PX700HD. It was about $400 cheaper than my first choice, so that was a plus!
Helpful tip: Make sure you know exactly where in the room you plan to mount a projector before you purchase one. Most projectors have a minimum and maximum “throw” distance. You want to make sure the projector can display the image in the size you want on the screen from where you want to mount the projector. I was going to mount the projector on the ceiling, so I had flexibility, but if you’re thinking of mounting on a back wall, for example, you need to make sure the image isn’t too large for the screen you have (or too small if you plan on having the projector very close to the screen.) I used the handy ViewSonic distance calculator to help me choose the proper projector.
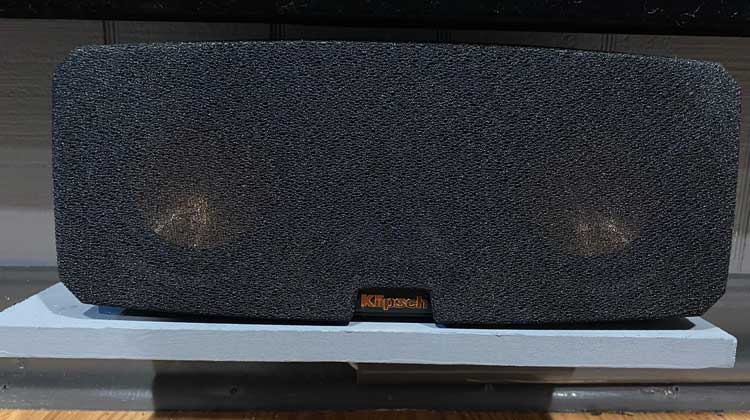
The next important component was the sound system. I didn’t just want to have a speaker system, I wanted a receiver that would support multiple components—Blu-Ray DVD player, another streaming device such as Roku, the projector, as well as maybe a compact disk player and turntable. I had read online that a good rule of thumb was to spend about as much on the sound system as you would on the projector. I’m not sure why that’s a rule of thumb, but I spent almost twice as much for the sound system as I did for the projector. 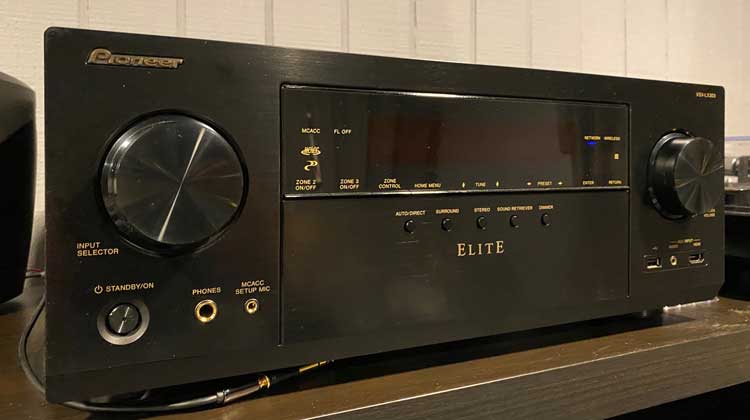 I purchased via Amazon a Pioneer VSX-LX303 9.2 Channel 4K Ultra HD Network A/V Receiver. Though I didn’t purchase a 4K projector and was going to go with a five-speaker surround-sound system rather than a seven-speaker system, I wanted to have the ability to upgrade in the future. There was no link to this particular model receiver on the Pioneer web site and it’s no longer available on Amazon, but the system was $499. For speakers, I bought a Klipsch Reference Theater Pack 5.1 Surround Sound System. At the time, Amazon had it for a little more than $500, but I was able to get one from Costco (as a member) online for $450.
For the screen, a few things went into this decision. First, there are recommended seating distances for certain screen sizes, so I kept my eye on this. For the most part, the main seating was going to be about 14 or 15 feet from the screen. But I also wanted the biggest screen that could fit the viewing wall. This site was helpful, but I also realized there can be great distances between the front and back row of a regular movie theater, so I figured I could cheat a little and lean toward the bigger screen. I picked a Silver Ticket 120-inch (diagonal) screen from Amazon for $250. From left to right, that’s about nine feet, and because of a bit lower ceiling in the room, the top and bottom of the screen were about a foot from the ceiling and floor, respectively.
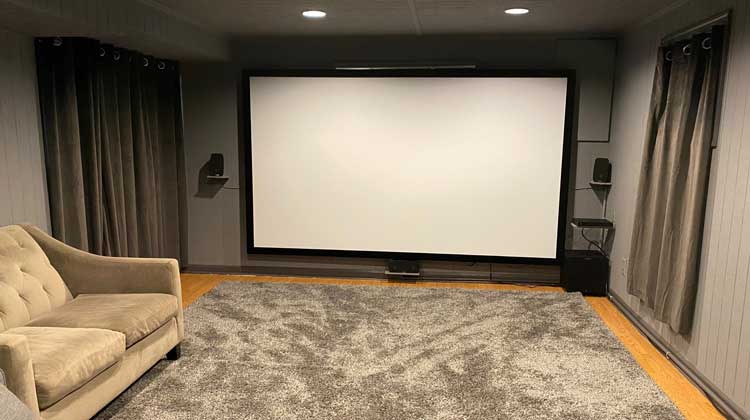 A note about screens: There are a lot of choices out there. The screen I chose was a fixed-frame screen. Other choices include retractable screens that work like a window shade and roll up when not in use. Since this was a completely dedicated movie room, I wasn’t going to have to move the screen, so I went with the fixed screen. (I had to fabricate a track of sorts to move it a foot or so to the left or right if we ever needed to access our home’s water shutoff, but it stays put most of the time.) There’s some assembly required, but a helpful YouTube video on how to assemble this particular screen made it easy. I highly recommend a fixed screen if your room can handle it.
The last main component was an LG Blu-ray Player with Wi-Fi Streaming from Walmart for $74. (I also purchased an Audio-Technica Direct-Drive Turntable from Amazon for $250 to listen to my small collection of vinyl, but that’s another story.)
Putting it all Together
With the painting complete and all of the main components, I started to assemble the room. Of course, this required many trips to Lowes, Home Depot, and Amazon for little necessities here and there.
I didn’t want to spend what seemed like a lot of money on official surround-sound speaker stands, which were something like $50 and higher, so I improvised. Each Klipsch speaker was rather small and not too heavy, so I created small shelves for each speaker around the room—two on either side of the screen, the main center speaker directly under the screen, and the two surround side speakers to the left and right of the viewing area. The shelves were made from small, even-cut pieces of wood painted the same color as the walls and mounted on the walls using a simple steel corner brace. All materials totaled about $25.
The speakers were not wireless, so the next step was figuring how much speaker wire I would need for three front and two surround speakers to connect to the receiver. With the receiver more than 15 feet from the screen behind the planned seating area, it would require a lot of wire, so I measured and then purchased 100 feet of speaker wire on Amazon for about $17. Though I was not going behind walls for this installation, I purchased CL2 rated wire for in-wall installation. I’m no pro at this, but each speaker wire has two conductors (red and black). The rated wire has the two conductors wrapped in a vinyl cover. Though it makes the wire a little tougher to maneuver, it also adds a level of protection, as I had to run each individual speaker along the walls back to the receiver.
 I also didn’t want ugly wires just strung across the walls, so I first thought of wire raceways to cover them. This was going to be a little expensive for the distance all of the wire would travel, so I instead purchased about 20 feet of 3/4- inch PVC pipe to run the wires through along the a baseboard and back to the receiver, and it worked well. The pipe was just about $10, and when painted the same color as the trim, it wasn’t very noticeable.
I put the DVD player near the screen in the front of the room on a shelf similar to the speakers. The main reason for this was so we wouldn’t have to point the remote behind us to use the DVD player. So I got a 25-foot HDMI cord ($17) to run from the DVD player to the receiver at the back of the room—which runs along the same path as the speaker wires.
After checking the throw distance for the projector, I determined the best spot for the ceiling mount.
A word about my ceiling mount experience: It’s easy to find ceiling mount hardware from different manufacturers that run upwards of $100. I went to Amazon, checked ratings (and ensured the mount would fit my projector) and purchased a VIVO universal projector mount for just $18. So definitely shop around. Different rooms, ceiling heights, and projector locations might require different types of mounts, but this mount, screwed into a joist works perfectly. It’s best to get one that’s somewhat adjustable, so you can turn on the projector and line it up perfectly with the screen before securing it in place.
Since I wasn’t doing any in-wall wiring, the projector hanging on the ceiling needed to be connected to the receiver with an additional 15-foot HDMI cable ($13), and it also had to be plugged into an outlet along an opposite wall. I used a heavy-duty appliance extension cord to connect it, and covered both the HDMI cord and extension cord with cable raceways ($12) that ran out each side of the projector along the ceiling and then down the sides of opposite walls.
Little Extras
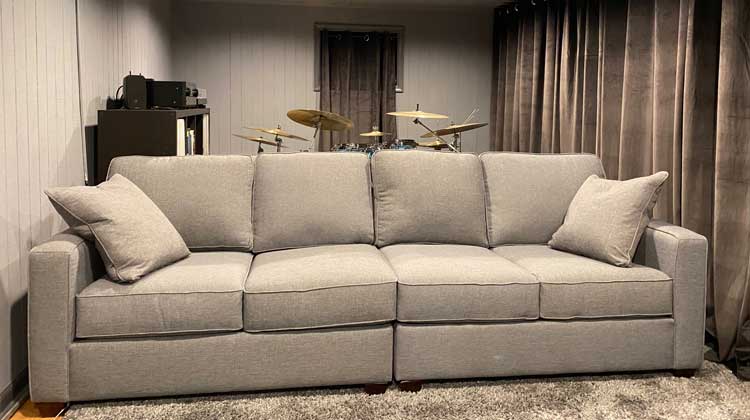
For my project, I was going for a little more than just a projector and screen. I wanted a few aesthetic enhancements. For example, the back of the left wall is covered with recessed shelves full of books. To reduce the look of clutter, I strung dark curtains along the front of the shelves to hide the books. For fun, we also placed curtains at the “entrance” of the room up front toward the screen and also covered two basement well windows with curtains for a more uniform look. We needed a lot of curtains, so the cost was about $175. We also splurged on seating, which was the biggest single-ticket item of the project—a new, four-seat sofa for about $1,600.
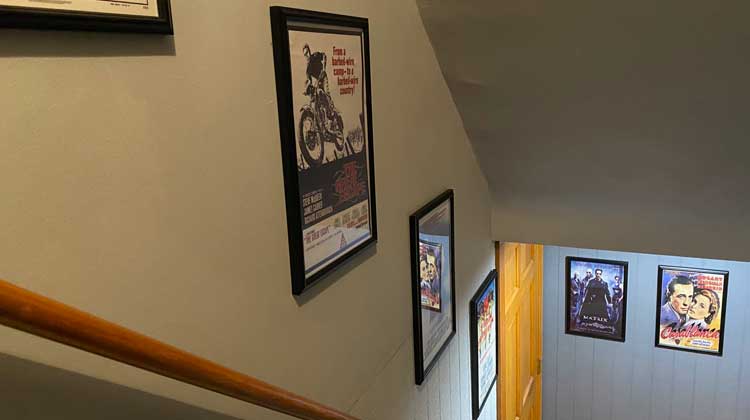
For kicks, I also purchased about 10 small-scale movie posters and a set of 10 frames to line the stairs that lead down into the movie room. The total cost was about $200. Fortunately, we already had a small movie-theater popcorn machine that has gotten a good workout since we started utilizing the room.
 As I mentioned before, a person can put a lot or a little into a movie room. You really don’t need anything other than projector, maybe a DVD player and some type of sound system, and they all could be done rather inexpensively. This whole package—built-in DVD player, projector—was on sale at Amazon as of this writing for about $150. Of course, we were looking for a bit more, but there are many ways to go about this.
For us, it wasn’t only a great addition of entertainment to our home life, it’s allowing us to utilize a part of our home that was going somewhat neglected. It’s turned into a nice little refuge—something we’ll enjoy for years.
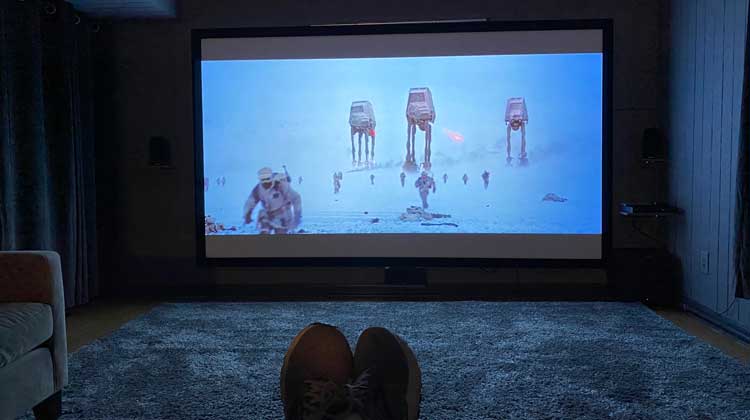
My only regret is that I didn’t do it sooner—and maybe that my wife now sees exactly how much money I spent on this little project!
I’m sure there are a few things I spent above and beyond these main components as I was working on the room, but here’s a breakdown of approximate costs for my project:
| Supplies and Equipment | |
| Paint | $105 |
| Carpet | $250 |
| Carpet Pad | $100 |
| Projector | $500 |
| Receiver | $500 |
| Surround Sound Speakers | $450 |
| Screen | $250 |
| Blu-ray DVD Player | $74 |
| Speaker Shelves/Hardware | $25 |
| Speaker wire | $17 |
| PVC Piping | $10 |
| HDMI Cables | $30 |
| Ceiling Mount | $18 |
| Cable Raceways | $12 |
| Curtains | $175 |
| Artwork | $200 |
| Sofa | $1,600 |
| Total: | $4,316 |
Christopher Prawdzik and his wife Angela Logomasini are licensed Realtors® with Samson Properties in Alexandria and are members of the Northern Virginia Association of Realtors® Top Producer’s Club. Operating as D.C. Region Real Estate, they serve the Virginia, Washington, D.C., and Maryland real estate market and offer comprehensive real estate services, including 4½% full-service listings.
© 2021 DCRegionRealEstateNews.com
